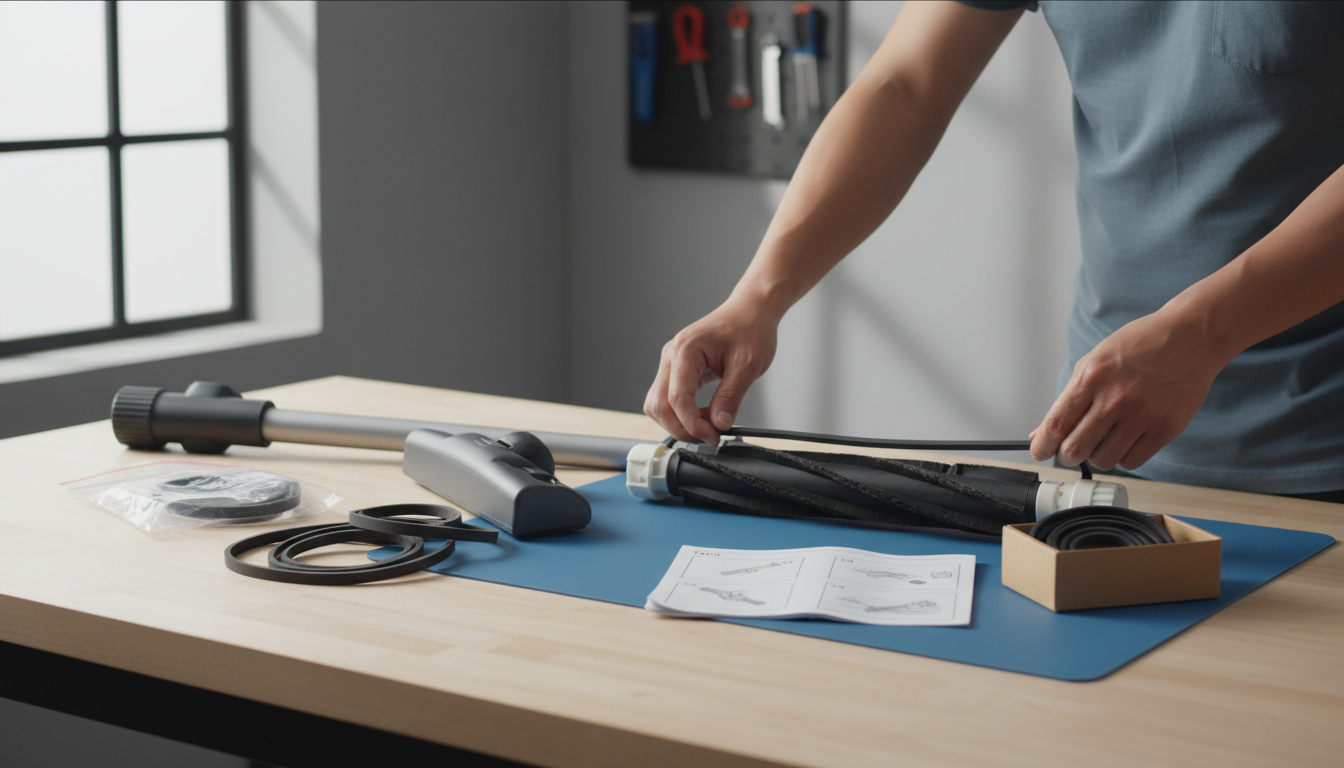
Bissell Vacuum Cleaner Belts: Choosing the Correct Replacement for Your Machine

Restore Your Bissell's Performance: A Guide to Replacement Belts
A Bissell vacuum operating below its potential, struggling to pick up debris, or emitting an unusual odor often points to a single, critical component: the drive belt. This unassuming part is essential for your vacuum's core functionality, enabling the brush roll to spin and agitate carpets, which is vital for effective cleaning and maintaining suction. When the belt is worn, stretched, or broken, your Bissell can't perform its primary task.
Recognizing the signs of a failing belt is the first step toward restoring your vacuum's efficiency. Common indicators include:
- Loss of suction: While many factors can cause this, a non-spinning brush roll due to a faulty belt significantly reduces debris pick-up.
- Brush roll not spinning: If the brush roll remains stationary when the vacuum is on, the belt is likely broken or dislodged.
- Burning smell: A stretched or slipping belt can generate friction and heat, leading to a distinct burning rubber odor.
- Increased motor noise without effective cleaning: The motor may be working harder to compensate for a failing belt, producing more noise but less cleaning action.
Selecting the precise replacement belt for your specific Bissell model is crucial. Using an incorrect belt can lead to poor performance, premature wear, or even damage to your vacuum's motor or brush roll system. This guide is designed to empower you with the knowledge to accurately identify your Bissell model, understand the nuances of belt types, and confidently choose the correct replacement to ensure optimal performance and extend the life of your machine.
Understanding Bissell Vacuum Belt Types and Why Fit Matters
The operational heart of many Bissell vacuum cleaners lies in the drive belt, a small but essential component that transfers power from the motor to the brush roll. Over its more than 125-year history, Bissell has developed a range of vacuum designs, each often requiring a specific belt type to ensure optimal cleaning performance and machine longevity. Identifying the correct replacement is not merely about finding "a belt," but rather the exact belt engineered for your model.
Bissell vacuums utilize various belt styles, each designed for a particular mechanical interaction. Common forms include:
- Flat belts: Often found in older or simpler designs, these provide a broad surface for friction.
- Round belts: Typically used where less torque is required or in more compact spaces.
- Cogged or Ribbed belts: These feature teeth or ridges that interlock with corresponding grooves on the motor pulley and brush roll, offering superior grip and preventing slippage, especially under load. Specific Bissell designations, such as "Style 7/9/10," refer to particular dimensions and configurations within these categories, ensuring a precise match for certain model series.
These distinct belt types are engineered to interact precisely with your Bissell vacuum's motor pulley and brush roll assembly. A belt's length, width, thickness, and material composition are all critical factors. The correct belt maintains the precise tension needed to spin the brush roll at its optimal speed, ensuring effective agitation of carpets and efficient debris pickup.
Using an incorrect belt can lead to several performance and durability issues:
- Poor brush agitation: An ill-fitting belt might slip, causing the brush roll to spin too slowly or inconsistently, reducing cleaning effectiveness.
- Motor strain: A belt that is too tight can overwork the motor, leading to overheating and premature failure. Conversely, a belt that is too loose will slip excessively, also straining the motor as it tries to compensate.
- Premature wear: Incorrect tension or material can cause the belt itself to degrade rapidly, requiring frequent replacements.
- Damage to vacuum components: Persistent slipping can wear down pulleys, while excessive tension can bend brush roll axles or damage motor bearings.
Bissell's commitment to specific, engineered designs means that a proper fit is paramount. Relying on a belt that doesn't perfectly match your vacuum's specifications can compromise both its immediate cleaning capability and its long-term operational health.
How to Identify Your Bissell Vacuum Model and Correct Belt Part Number
Selecting the right replacement belt for your Bissell vacuum begins with accurately identifying your specific model. A precise match ensures optimal performance and prevents damage to your machine. Generic belts or incorrect sizes can lead to reduced suction, brush roll malfunction, or premature belt failure.
Follow these steps to pinpoint your vacuum's essential identification details:
-
Locate the Model Number on Your Vacuum:
- Upright Vacuums: Check the back or bottom of the main power unit. The model number is often on a sticker near the wheels, base plate, or behind the dust cup/bag compartment.
- Canister Vacuums: Look on the underside of the canister body or the back of the motor housing.
- Stick Vacuums: The sticker is typically on the main body, often near the handle or the base where it connects to the floor nozzle.
- Handheld Vacuums: Usually found on the back or bottom of the unit.
- The model number is typically a combination of letters and numbers (e.g., "2252," "PowerForce Helix 1700," "3031120").
-
Consult Your Owner's Manual: If you still have the physical manual that came with your vacuum, it will clearly list the model number and often the specific part numbers for replacement components, including belts.
-
Utilize Bissell's Official Support Website:
- Navigate to Bissell's support or parts section on their website.
- Use their product search feature to enter the model number you found.
- The product page for your vacuum should list compatible accessories and replacement parts, including the correct belt part number. This is a reliable source for exact matches.
-
Examine the Existing Belt (If Accessible):
- If your old belt is still intact or you have removed it, inspect it for any printed numbers or codes. Some belts, particularly genuine OEM parts, may have a part number directly on the rubber (e.g., "P/N 3031120").
- Note the belt's general appearance, such as its width, thickness, and whether it's flat, round, or cogged (toothed), as this can help confirm a match.
It is critical to use the exact model number or the specific belt part number when searching for replacements. Even slight variations in model numbers can indicate different belt requirements, impacting fit and performance.
Key Considerations When Selecting a Replacement Bissell Vacuum Belt
Choosing the correct replacement belt for your Bissell vacuum is crucial for maintaining its cleaning performance and extending its lifespan. A precise fit and quality material ensure the brush roll spins effectively, picking up debris as designed. Carefully evaluating several factors will guide you to an informed purchase.
-
Compatibility Verification The most critical step is confirming the belt's compatibility with your specific Bissell vacuum model.
- Model Number: Locate your vacuum's model number, typically found on a sticker on the back or bottom of the unit.
- Part Number: If possible, identify the part number of the original belt or consult your vacuum's manual or Bissell's support website for the correct belt style or part number. Belts are often categorized by "style" (e.g., Style 7/9/10).
-
Material Quality The durability of a replacement belt directly impacts its longevity and performance.
- Look for belts made from robust, reinforced rubber or similar resilient materials. These are designed to withstand the friction and tension of the brush roll, reducing the likelihood of premature stretching or breakage.
- Inferior materials can lead to frequent replacements and inconsistent cleaning power.
-
OEM vs. Aftermarket Options You'll encounter both Original Equipment Manufacturer (OEM) and aftermarket replacement belts.
- OEM Belts: These are manufactured by Bissell and are guaranteed to meet the original specifications for your vacuum. They often offer the most reliable fit and performance.
- Aftermarket Belts: Produced by third-party manufacturers, these can be a cost-effective alternative. However, it's essential to ensure any aftermarket belt explicitly states it meets or exceeds the specifications for your Bissell model to avoid issues with fit or durability.
-
Purchasing Options Consider whether a single belt or a multi-pack best suits your needs.
- Single Belts: Suitable if you only need an immediate replacement.
- Multi-Packs: Often provide better value and ensure you have spares on hand. For example, some common styles like 7/9/10 are available in 4-packs, which can be convenient for future replacements.
-
Supplier Reliability Where you purchase your replacement belt can be as important as the belt itself.
- Opt for reputable retailers or directly from Bissell's official channels. This helps ensure you receive genuine OEM parts or high-quality, accurately specified aftermarket alternatives.
- Purchasing from unknown or unverified sellers increases the risk of receiving incorrect, low-quality, or counterfeit belts that may fail prematurely or damage your vacuum.
Common Bissell Belt Problems, Trade-offs, and Troubleshooting
Understanding potential issues with Bissell vacuum belts can help you identify problems early and take corrective action, prolonging your machine's life and maintaining cleaning efficiency. Recognizing these failure points is crucial for informed belt replacement decisions.
-
Premature Belt Breakage: Belts can snap sooner than expected for several reasons. Often, this is due to debris like hair, string, or carpet fibers becoming tightly wound around the brush roll, creating excessive resistance. Overuse, such as continuously vacuuming thick pile carpets without clearing obstructions, can also strain the belt. While less common, an incorrectly sized belt (too tight) or a manufacturing defect can also lead to early failure. User reports sometimes indicate that Bissell belts can break quickly, underscoring the importance of regular inspection.
-
Loss of Tension: A belt that loses tension will not effectively transfer power from the motor to the brush roll. This can manifest as the brush roll spinning slowly, inconsistently, or stopping entirely, even if the vacuum motor sounds normal. The primary trade-off here is reduced cleaning performance, particularly on carpets, as the brush roll's agitation is critical for lifting embedded dirt. A stretched or worn belt is the usual culprit, indicating it's time for replacement.
-
Burning Smell: A distinct burning rubber smell often signals excessive friction. This typically occurs when the belt is slipping on either the motor shaft or the brush roll, or if the brush roll is jammed and the belt is struggling to turn it. An incorrect belt type (e.g., one that's too tight or made of unsuitable material) can also generate excessive heat. Ignoring a burning smell can lead to the belt snapping or, in severe cases, damage to the vacuum's motor.
-
Navigating Support Challenges: Some users have reported difficulties with customer service, including issues with online systems for warranty registration or obtaining support. When facing belt-related problems, it's advisable to consult Bissell's official support website for model-specific troubleshooting videos and parts diagrams. Having your vacuum's exact model number ready can streamline the process, whether you're seeking official parts or exploring reputable third-party alternatives.
-
Maintenance for Belt Longevity: Simple, consistent maintenance can significantly extend the life of your vacuum belt:
- Regular Brush Roll Cleaning: Periodically remove hair, threads, and other debris wrapped around the brush roll. This reduces strain on the belt and prevents jams.
- Avoid Large Debris: Do not vacuum up large, hard objects that can jam the brush roll or damage the belt.
- Inspect for Wear: During routine cleaning, visually inspect the belt for cracks, fraying, or signs of stretching. Replace it proactively if wear is evident.
- Proper Storage: Store your vacuum in a moderate environment to prevent extreme temperatures from degrading the belt material.
General Steps for Replacing a Bissell Vacuum Belt (Safety First!)
Replacing a vacuum belt can seem daunting, but it's a common maintenance task that can significantly restore your Bissell's cleaning power. While the exact procedure varies by model, understanding the general steps and, critically, prioritizing safety will guide you through the process. Always remember that these are generalized instructions; your specific Bissell model's manual or official support resources are the definitive guide.
-
Prioritize Safety: Before attempting any maintenance or repair on your Bissell vacuum, always unplug it from the electrical outlet. This crucial step prevents accidental startup and reduces the risk of electrical shock or injury. Ensure the vacuum is completely powered off and disconnected before proceeding.
-
Gather Essential Tools: Most belt replacements require only basic household tools.
- Screwdriver: Often a Phillips head, for removing screws securing the brush plate or cover.
- Gloves: Optional, but can protect hands from dust and debris.
- New Replacement Belt: Ensure you have the correct belt for your specific Bissell model.
-
General Replacement Process:
- Access the Brush Roll Area: Lay the vacuum flat, usually on its front or side, to access the brush roll.
- Remove the Brush Plate/Cover: Locate and unscrew any fasteners holding the brush plate or bottom cover in place. Carefully lift or slide off the cover to expose the brush roll and belt.
- Remove the Old Belt: If the belt is broken, remove any remaining pieces. If it's stretched or worn, carefully slide it off the motor shaft and the brush roll.
- Lift the Brush Roll (If Necessary): Many Bissell models require you to lift or remove the brush roll to properly seat the new belt. This typically involves lifting it out of its housing.
- Install the New Belt: Loop the new belt around the motor shaft first, then stretch it over the brush roll. Ensure it sits correctly in any grooves on both the motor shaft and brush roll.
- Reinsert the Brush Roll: If removed, carefully place the brush roll back into its housing, ensuring the belt remains properly seated and the brush roll spins freely.
- Reattach the Cover: Replace the brush plate or bottom cover and secure it with the screws you removed earlier.
-
Consult Model-Specific Instructions: Bissell manufactures a wide range of vacuum models, each with unique design elements. For precise, step-by-step guidance tailored to your machine, always refer to your vacuum's owner's manual. Bissell's official support website also provides detailed instructions and helpful video tutorials for many models, such as those for CleanView® or PowerForce®/PowerGroom® vacuums, which can be invaluable resources.
-
Post-Replacement Check: Once the new belt is installed and the vacuum reassembled, perform a quick test. Plug the vacuum back in and briefly turn it on to ensure the brush roll spins freely and correctly. Listen for any unusual noises and confirm that the vacuum operates as expected before resuming normal cleaning.
Frequently Asked Questions About Bissell Vacuum Belts
Understanding the nuances of Bissell vacuum belts can help maintain your machine's performance and extend its life. Here are answers to common questions that arise when considering belt replacement.
How often should I replace my Bissell vacuum belt?
There's no universal schedule for belt replacement, as it largely depends on your vacuum's usage frequency and the types of surfaces cleaned. However, key indicators suggest it's time for a new belt:
- Visible wear: Cracks, fraying, or stretching are clear signs of degradation.
- Reduced performance: If the brush roll spins slowly or stops entirely, or if suction seems diminished, the belt may be failing.
- Noise: An unusual squealing or grinding sound can indicate a slipping belt.
For average household use, inspecting the belt every 6 to 12 months and replacing it annually is a reasonable practice to preempt performance issues.
Can I use a universal belt for my Bissell vacuum?
Using a "universal" belt for your Bissell vacuum is generally not recommended. Bissell vacuums are engineered with specific belt dimensions, materials, and tension requirements tailored to each model's motor and brush roll system. An incorrect belt, even if it appears to fit, can:
- Reduce cleaning effectiveness: Improper tension can cause the brush roll to spin too slowly or not at all.
- Cause premature wear: Belts that are too tight or loose can wear out quickly or strain the motor.
- Damage components: An ill-fitting belt can potentially overheat or damage the motor, brush roll bearings, or other internal parts.
Always prioritize belts explicitly designed for your Bissell model number.
What does a burning smell mean when I'm vacuuming?
A burning smell, often resembling burning rubber, during vacuum operation is a significant warning sign. It typically indicates that the vacuum belt is slipping or encountering excessive friction. This can happen if:
- The belt is stretched or worn: A loose belt can slip on the motor shaft or brush roll, generating heat.
- The brush roll is obstructed: Hair, carpet fibers, or debris wrapped around the brush roll can cause it to jam, forcing the belt to slip as the motor tries to turn it.
- The belt is too tight: An incorrectly sized or new, overly tight belt can create excessive friction.
If you detect a burning smell, immediately turn off and unplug your vacuum. Inspect the brush roll for obstructions and check the condition of the belt.
Where can I find my Bissell vacuum's model number?
Locating your Bissell vacuum's model number is crucial for identifying the correct replacement belt. The model number is usually found on a rating plate or sticker affixed to the vacuum cleaner itself. Common locations include:
- The back or side of the main body.
- Underneath the canister or dirt cup.
- On the base of the unit, near the wheels.
- Inside the owner's manual.
The model number is typically a series of numbers and sometimes letters, distinct from the serial number.
Are OEM belts always better than aftermarket ones?
OEM (Original Equipment Manufacturer) belts are produced by Bissell or their authorized suppliers and are designed to meet the exact specifications, materials, and quality standards of your specific vacuum model. This often ensures optimal fit, performance, and durability.
Aftermarket belts, produced by third-party manufacturers, can offer a more budget-friendly alternative. Their quality, however, can vary significantly. While some aftermarket options may perform comparably to OEM belts, others might use different materials or have slight variations in dimensions that could affect tension, lifespan, or even risk damage to your vacuum over time. When considering aftermarket belts, it's important to weigh the potential cost savings against the assurance of precise fit and quality that OEM parts typically provide.
Making the Right Choice for Your Bissell Vacuum's Longevity
Restoring your Bissell vacuum to its full cleaning potential hinges on a thoughtful approach to belt replacement. The process, while seemingly straightforward, benefits greatly from careful attention to detail at each stage. Your success in bringing your vacuum back to optimal performance relies on accurately identifying your model, carefully selecting the appropriate replacement belt, and ensuring its proper installation.
The critical steps for a successful repair include:
- Accurate Identification: Confirming your specific Bissell vacuum model number and the original belt's specifications is paramount. This often involves checking your vacuum's label or owner's manual to ensure you match the exact part number or style.
- Careful Selection: Once identified, choose a replacement belt that precisely matches the original in material, size, and type (e.g., flat, cogged, round). This ensures compatibility and prevents premature wear or damage to your machine.
- Proper Installation: Follow your Bissell model's specific instructions for belt replacement. This typically involves safely accessing the brush roll area, removing the old belt, and correctly seating the new one around the motor shaft and brush roll, ensuring proper tension without overstretching.
The payoff for this diligence is significant. Using the correct belt directly translates to restored cleaning performance, as the brush roll can once again agitate carpets and floors effectively. This not only improves your vacuum's immediate functionality but also contributes to the extended life of your machine by preventing undue strain on the motor and other internal components. Investing the time to get the right part can help you avoid more costly repairs down the line, ensuring your Bissell continues to serve your cleaning needs efficiently. Take the necessary steps to verify your vacuum's requirements; it's a small effort that yields lasting benefits for your machine's efficiency and longevity.
More in Vacuum Cleaner Belts
View All